H. P. Friedrichs (AC7ZL) Homepage


My Projects
Kaden's Guitar
Introduction
I have a couple of guitars, relics I'd guess you'd say, of another time and another life. Back then, music was central to my life and something that I pursued in earnest. One of these guitars roosts perpetually on a stand in my home office (as opposed to lying in its case.) It's deployment in this fashion is intentional because, while I no longer play with any regularity, let alone perform or record, sometimes the mood strikes me and I amuse myself with a chord progression or a scale or two.
My grandson has always eyed this guitar with reverence and envy. Rather than forbidding him to touch it, I have always encouraged his interest. As long as he was careful, I told him, he could remove it from the stand and rake the strings as he sees fit. To his credit, he's always been very careful not to drop the guitar, and not to bang the headstock into things. Truth be told, I'm not all that surprised, as he's been competent enough to plug in patch cords and tweak the knobs on my practice amp since he was two or three.
One day he approached me about something that, for him, was obviously a serious matter. "Can I ask you a question?" he asked. When I nodded, he worked up his nerve for a moment and then asked, "Do you think I could have that guitar?"
I paused long enough to show respect for his question and answered this way: "Yes... but not right now." I went on to remind him that he was only six, that he hadn't yet learned any chords, and that I'd be more confident about turning it over to him when I could be sure it would be properly cared for. I think the spark of hope largely trumped any disappointment he may have felt. He's always been a pretty rational kid, so I think he was satisfied with my reasoning.
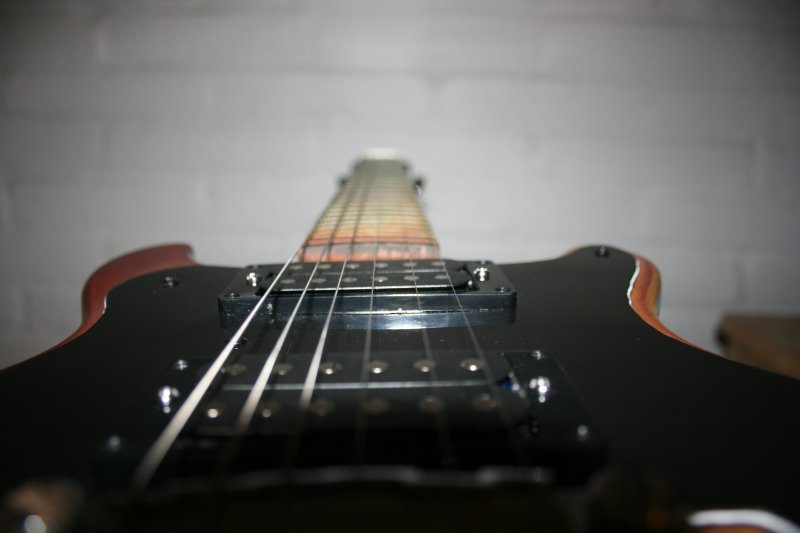
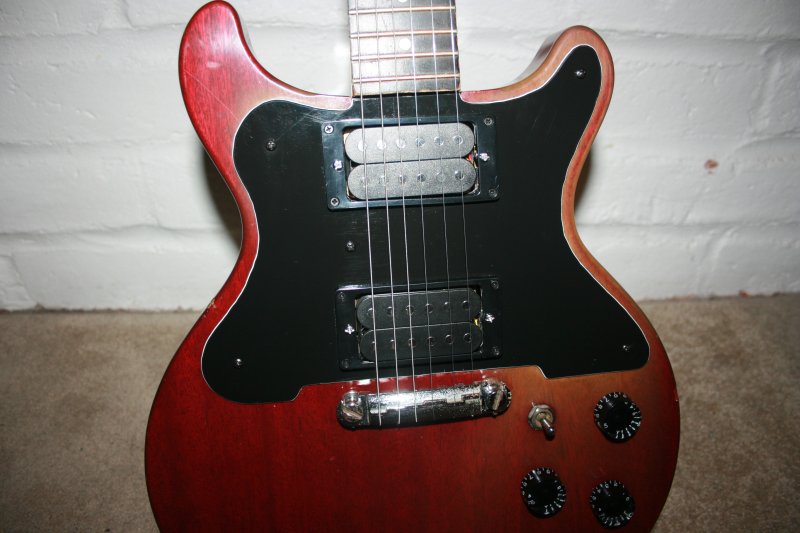
Figure 1: Kaden's guitar
Finding Kaden's Guitar
I decided at that point that I wanted Kaden to have his own guitar. If he cared for and made productive use of it, I could be certain that he would do the same if I gave him mine. Thus, I wanted to find a real instrument for him, not a silly toy. Nothing can crush the aspirations of a budding musician quite like an inferior instrument, so whatever I got for him had to be halfway decent and playable.
I'd heard that Flash, a co-worker of mine, used to deal in guitars and amplifiers as a sideline. I asked him if he might have an inexpensive guitar for sale, perhaps even a reduced-scale student-type instrument. I was disappointed to hear that he had sold the last of his inventory and had ceased horse-trading a few years earlier. But, he promised, he'd look through one of his storage areas to see if there was anything left over. A few days later, he dropped off a dismembered guitar body and neck at my office.
As near as I could tell, the guitar was a late 60's or early 70's Japanese Gibson clone. It's parts were in pretty rough shape. The neck was detached, and much of the hardware, including the neck plate, was missing. There were no machine heads. There was was no pick guard, and no screws. The finish showed obvious signs of water damage. Two P-90-esque "soap bar" pickups, wrapped in a sandwich bag, were missing their covers, and also showed signs of immersion in water.
On the plus side, the guitar looked to be made of a nice piece of mahogany and, to my eye, had a pleasing shape. The frets didn't look to be in bad condition. The nut was still there, and the original bridge lay in the sandwich bag with the pickups. Flash had kindly given the carcass to me for free in the (well founded) belief that I would do something useful with it.
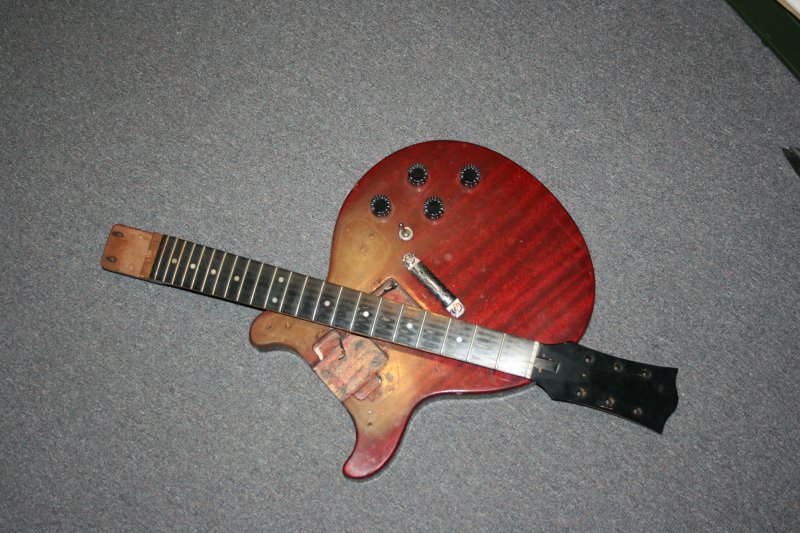
Figure 2: Starting parts
Putting Humpty Dumpty Back Together Again
The first step, as I saw things, was to reattach the guitar's neck to its body. On inspection, it became apparent that this guitar's neck relied upon four fasteners. Two of them had passed through the body and the neck, and had been secured with nuts. The other two must have had wood-screw-type threads. Those passed through the body but bit into the wood at the base of the neck.
Rummaging through the screw bins at my local ACE hardware store, I was able to find some stainless steel screws, two with machine threads and two with wood threads, that fortunately shared identical head profiles. I also purchased two matching nuts, the kind with the nylon insert that renders them self-locking.
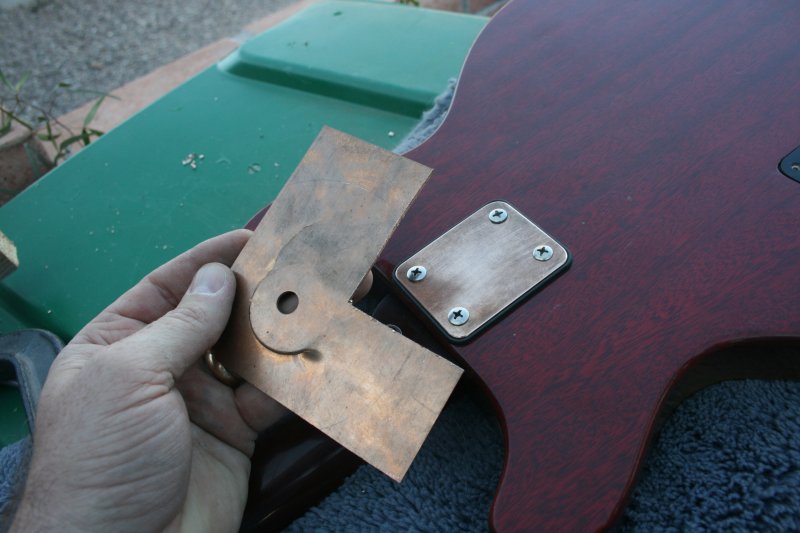
Figure 3: Some bronze scrap and my homemade neck plate
As I indicated earlier, the neck plate for this guitar was missing. I searched eBay and several online suppliers of guitar parts. I ordered a chrome plate with a black plastic bezel that I thought might work. Unfortunately, it proved to be unusable because the hole spacing on this guitar doesn't match the contemporary standard. So, I was left to fabricated my own.
Digging through a junk box, I found a small chunk of bronze plate that I had lifted out of a garbage can somewhere. On it, I scribed the perimeter for a new plate, and then cut it free with a hacksaw. I purposefully cut the plate slightly over-sized, and then dressed it to its final dimensions with a bastard file. The plate was sized to fit the bezel from the unusable plate I'd purchased online. I drilled and countersunk four holes in the appropriate positions. Finally, I attached the guitar's neck to the body with the screws, bolts, bezel, and newly-fashioned plate.
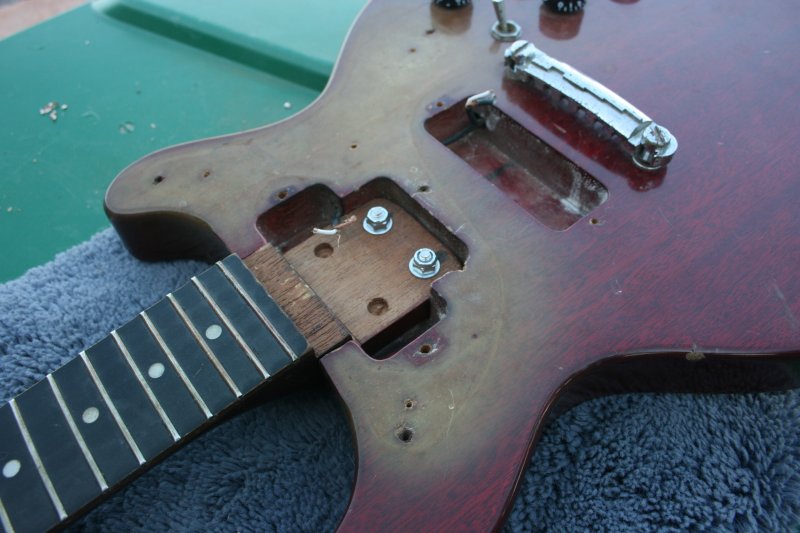
Figure 4: Reattaching the neck
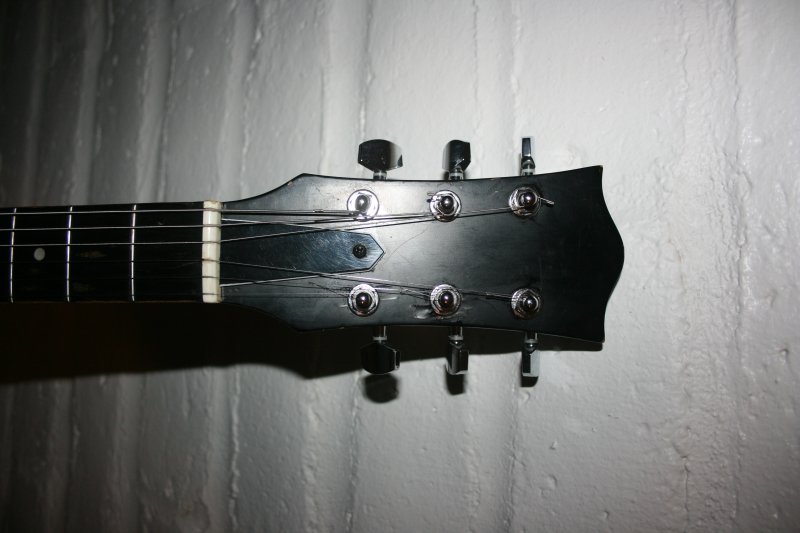
The Headstock
Next, I turned my attention to the guitar's headstock. As evidenced by numerous screw holes, this guitar had been fitted with at least three different sets of machine heads (tuners) during its prior life. The wood also showed damage where the tuner bushings had been pried out.
I used toothpicks to apply wood glue to the areas around the bushing holes where the wood was chipped or splintering. I positioned a piece of sheet metal over the top of the headstock and another over the bottom, and then clamped the resulting "sandwich"with a C-clamp. This caused the glued chips and splinters to dry flat and even with the headstock's surface.
I also drove glue-laden toothpicks into the tuner screw holes to plug them up. When the glue was dry, I used wire nippers to clip off the protruding wood and gently beat upon the the plugs with the back of a plastic screwdriver to render them flush. I then touched each repair with the point of a Sharpie pen to blacken it. Since the finish on the headstock is already black, the repairs really aren't all that noticeable.
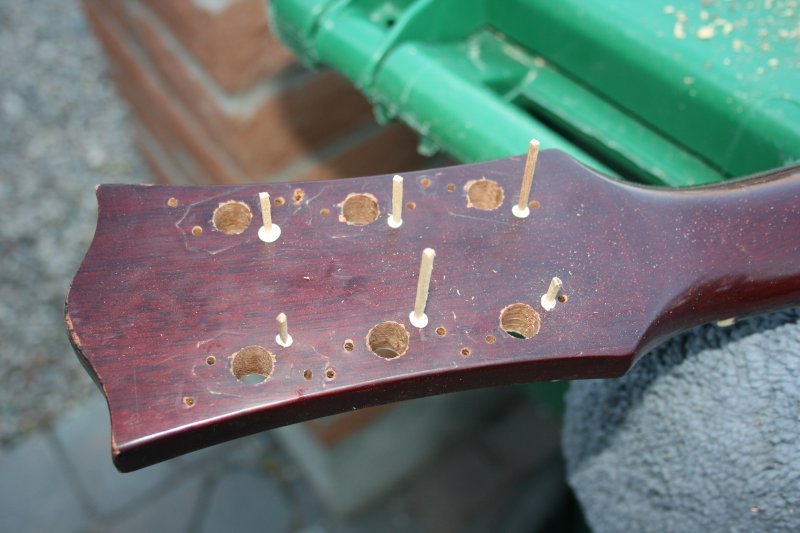
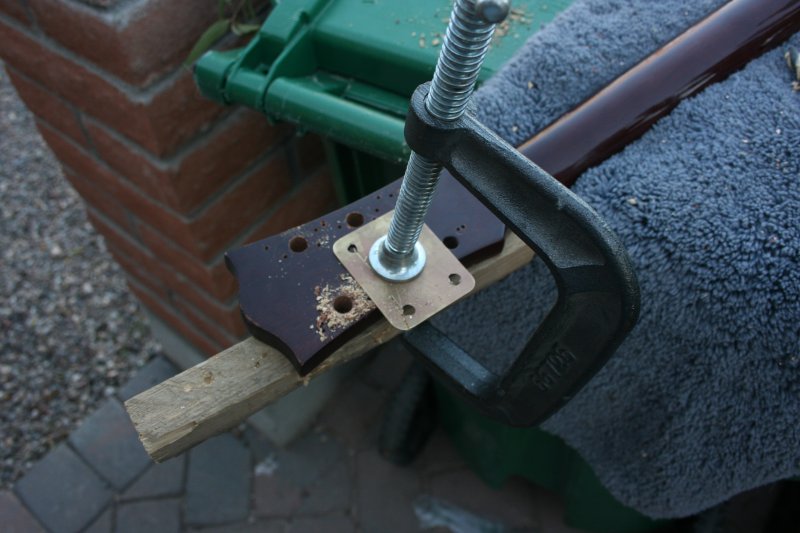
Figures 5 and 6: Filling screw holes and enlarging the holes for the tuner bushings
Surfing the web, I found a set of inexpensive, sealed, chrome machine heads on eBay. At $9.99, plus free shipping, I didn't have overly-high expectations. Yet when they arrived, I was pleased to find them to be of good quality. Installation required that I enlarge the bushing holes in the headstock. Simply pushing a drill bit through the headstock is guaranteed to splinter the wood where the bit exists. To prevent this, I backed the headstock with a piece of scrap wood prior to drilling.
The machine heads are held in place by a threaded bushing and washer installed from the face of the head stock. A tiny wood screw, installed from the rear, anchors each tuner and prevents it from twisting in the bushing hole when tension is applied to the strings.
Once the machine heads were in, I temporarily replaced the guitar's bridge and installed a set of Custom Light guitar strings. I tuned up the guitar to standard E tuning and set it on a guitar stand. Over the course of the following two weeks, I tweaked the tuning, tweaked the bridge and truss rod adjustments, and played the guitar acoustically. The point of this exercise was to see if the guitar was stable enough to hold tune, and playable enough to make further restoration worth my effort. Happily, the guitar settled down after a day or two, and after that, it remained both stable and playable.
Pickups
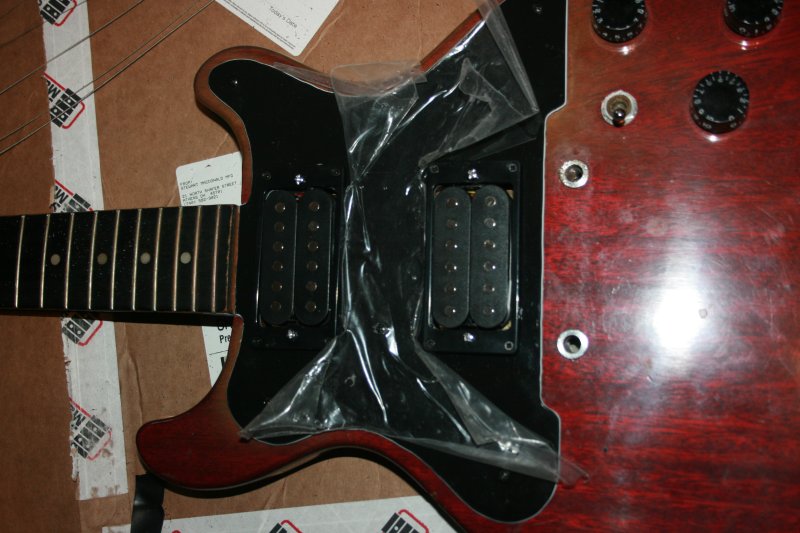
I decided I didn't want to mess with the original pickups. Given their physical condition, I wasn't sure that they worked. Even if they did, I didn't have covers for them, and I was unable to find replacements that matched the old pickups' pole spacing. I decided that some humbuckers might be the ticket.
Another visit to eBay located a set of two black humbuckers, one neck and one bridge pickup, for the astonishing price of $16.98. This included the trim rings, springs, and adjustment screws.
The humbuckers turned out to be somewhat larger than the old soapbox pickups, which obligated me to enlarge the pickup cavities in the guitar's body. There are proper ways to do this, and then there is the way I used-- a Dremel tool and a router bit. I marked the desired cavity shape on the body with a pencil, and applied the Dremel tool freehand. The resulting cavities are not geometrically perfect (as would be the case had they been cut by a router and template,) but given that they were to be covered by a pick guard anyway, my Dremel work was good enough.
Pick Guard
Fabrication of the pick guard turned out to be one of the more time-consuming tasks associated with this project. For some time, I studied the guitar visually, trying to decide what a new pick guard should look like. I had some idea of the original guard 's shape, and trying to find an off-the-shelf replacement was a possible option.
Yet the finish on the face of the guitar was badly damaged by exposure to water. A complete strip and refinish job was much more than I was prepared to tackle, so I began to consider ways in which a new guard could be designed to conceal the worst of the damage. I purchased a sheet of white poster board from an office supply store and used it to fashion a paper template.
The process for developing the template was mostly a matter of cut-and-try. I removed the strings from the guitar to give me unfettered access to the body, and laid a piece of poster board on the face of the guitar. The body was already riddled with screw holes, so I pushed a couple of toothpicks through the poster board and into these holes to act as locating pins. This allowed me to remove the template to cut and shape it, and then replace it, while guaranteeing that it always returned to the original alignment.
I started shaping the template by accommodating major landmarks like the guitar's neck and bridge. Beyond that, I shaped the template's perimeter by mimicking the general shape of the body. I took my time exploring the proper balance between what would be covered and what would remain uncovered wood.
Once I was satisfied with the template, the next step was to fabricate the actual pick guard. An outstanding source for pick guard material is a dealer called Steward McDonald. They sell an endless variety of guitar parts and luthier tools, including sheets of plastic suitable for the fabrication of custom pick guards. The material I chose was a three-ply ABS laminate, two layers of black with a middle layer of white. I chose this material because when the edges of the pick guard are beveled, the white layer appears as a tasteful pinstripe around the perimeter of the guard.
I used a scribe to transfer the shape of the template to the pick guard material. I then used my Dremel tool, with a router bit, to rough-cut the pick guard. As was the case with the neck plate, I cut the pick guard slightly oversized, then trimmed it to final size with rasps, files, a sandpaper block, and single-edged razor blades.
I cut the openings for the new pickups using a similar strategy. They were initially cut undersized, then enlarged to their final size and shape with the same tools.
When the pick guard's shape was correct, I beveled the perimeter of the guard by hand. This was done by using a carpet knife to hand-scrape/shave around the outer edge.
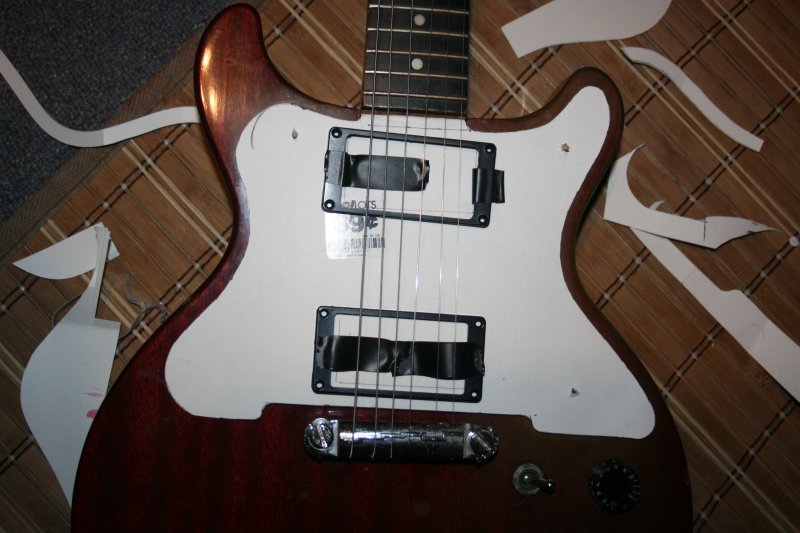
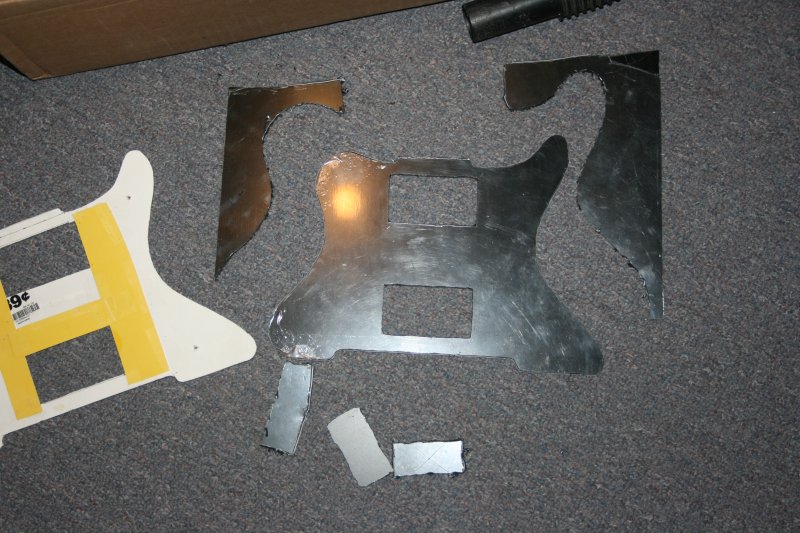
Figures 7 and 8: The paper pick guard template, and guard rough-cut from ABS stock
Two comments about the pick guard work: First, the ABS stock is shipped with a thin clear film pasted to the surface of the sheet. This is intended to protect the plastic from scratches. I left the film in place the entire time I worked the pick guard, and did not remove it until the guitar was fully reassembled. My second comment is that on close inspection, some of guard's edges exhibit a bit of wave or ripple. This is an artifact of the handcrafted nature of the work. The final project would have benefited from access to a drum sander, which would have removed these flaws. However, I make no apology for the finished product.
More Pick Guard Pieces
While I stood ankle-deep in ABS plastic shavings, I decided to fabricate two additional guitar parts from the left over pieces of stock. The guitar's original jack plate was broken and needed to be replaced. The guitar's truss rod cover was missing entirely.
The jack plate is a simple rectangle with a jack hole at its center, and four small screw holes at each corner. I used the broken plate as a template and transferred its features to the pick guard material with a scribe. When I'd finished cutting, shaping, drilling, and beveling it, the new part was more or less indistinguishable from the old. A final touch was to warm the new plate with a hot-air gun, just enough to soften the plastic. I worked it with my fingers to give it a gentle curve or arch, so that the plate would follow the contour of the body when installed.
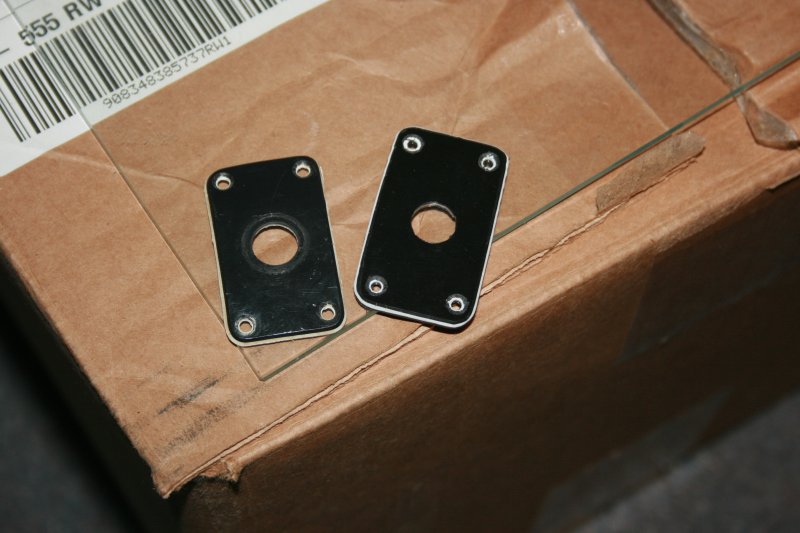
Figures 9 and 10: A homemade jack plate and a homemade truss rod cover
The obelisk-shaped truss rod cover was something I dreamed up. It was designed to be large enough to cover the truss rod adjuster, and shaped so that I could use an existing screw hole to secure it. I started with a small paper template, transferred the design to the ABS sheet, and then cut and shaped it as already described.
Final Assembly
Final Assembly involved a host of small details. I installed the pick guard and truss rod cover using a set of small black wood screws that I had purchased on Ebay for $2.50. I mated the new pickups to their mounting rings, and then attached the rings to the guard with the supplied screws.
Inside the control cavity, the pickup wires were soldered to the appropriate terminals of the guitar's The control pots were each cleaned and conditioned with a shot of Caig Faderlube. I replaced the rear cover and secured it with screws.
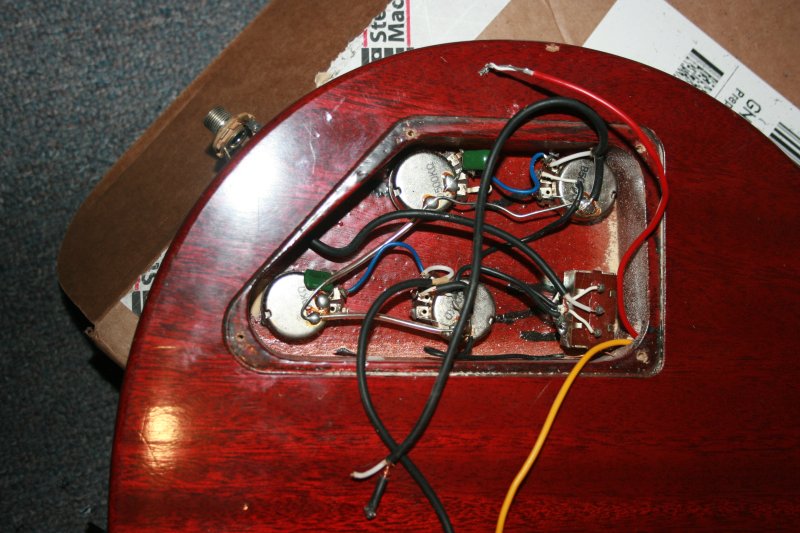
Figures 11 and 12: Installing the pick guard, installing and wiring the pickups
Finally, I restrung the guitar, tuned it up, and plugged it into my practice amp. Nice. It had turned out far better than I had expected. Kaden's birthday was a week or two away, and I had finished the guitar just in time.
Accessories
I'd had vague plans to build Kaden a small amplifier to go with this guitar, but time got away from me. I decided instead to give him my old Peavy practice amp. The amp was already used when I had purchased it ten or more years ago, so by this point it was showing signs of wear. I stripped the cabinet, removing the amplifier chassis, the speaker, and all of the cabinet hardware. I cleaned and scrubbed the cabinet with mild detergent and a brush. I cleaned and polished all of the cabinet hardware and reinstalled it. The speaker was vacuumed and reinstalled. I vacuumed the amplifier chassis, then treated all of the pots with Faderlube. When the amp was finally reassembled, it looked and functioned as though new.
I figured that a kit wasn't complete without a patch cord, a gig bag, and a tuner. I ordered some inexpensive items from a Chinese online dealer called Suntekstore. The patch cord and gig bag were of adequate quality. The tuner, which only cost $8.00, turned out to be identical to one I had purchased locally, and had paid $25 for!
Conclusion
Every once in a while, when I document a project like this, I receive a note of criticism. "Why bother," someone will say. "You could have bought something brand new for less money or less hassle." I suppose this it's a legitimate criticism, but only if you don't understand the point of a project like this.
Children are amazingly sophisticated these days. When I think back to when I was little, I can't recall thinking the deep thoughts or worrying about the adult things that my grand kids do. Kaden, for example, is remarkably mature about the acquisition of things. He understands that you can't have something if you don't have the money to pay for it. If only Congress and the President of the United States had one-tenth of his maturity.
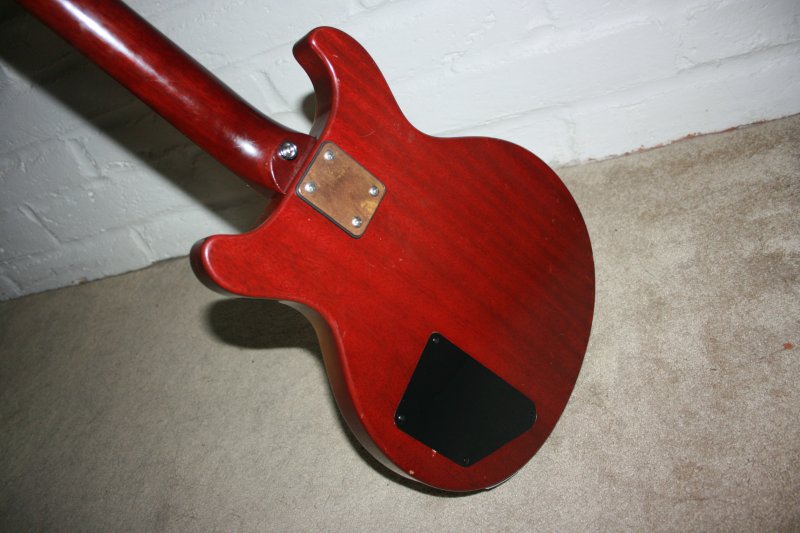
Figures 13 and 14: Finished guitar, front and back
Yet, there is another option, an option that I take every opportunity to demonstrate to my kids. A clever person, a creative person, someone with knowledge of science or engineering, or a craftsman who has worked to develop skills with tools and their hands, can often transcend situational limitations. People like this can fabricate for themselves what circumstances might deny them, or even create that which has never existed. I want my grand kids to be able to experience the joy and freedom that comes with these skills.
I have no delusions of being a luthier, but I was able to fashion something that made a little kid very happy on his birthday. I wait with cautious optimism for the day when he finally asks me to show him some real chords. If that day never comes, this project will still have been worthwhile if it inspires him to tinker, experiment, or create. I already see evidence of this being the case.
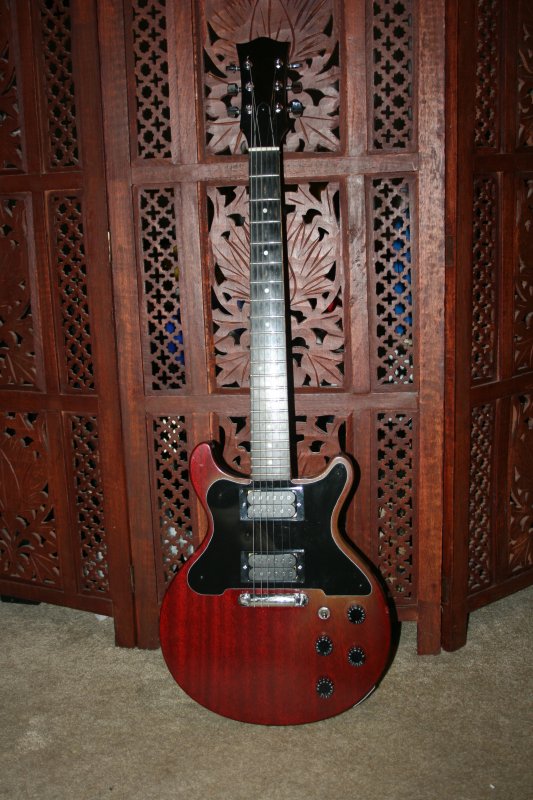
Figure 15: The finished guitar
(pilot 02/19/13)