H. P. Friedrichs (AC7ZL) Homepage


Radio Room
Ruggedizing the FT-60R
Introduction
It was a Saturday for exploration. My son and I had driven 10 or 15 miles along a primitive road back into the desert. Over the course of the morning, we had made several stops, investigating rock formations and poking about in heaps of gravel and mine tailings. We had explored a very old cemetery in the middle of nowhere, and later picked through the remains of an old mining camp's refuse heap. For someone with the right eye, the right attitude, and a camera, there are treasures to be found everywhere.
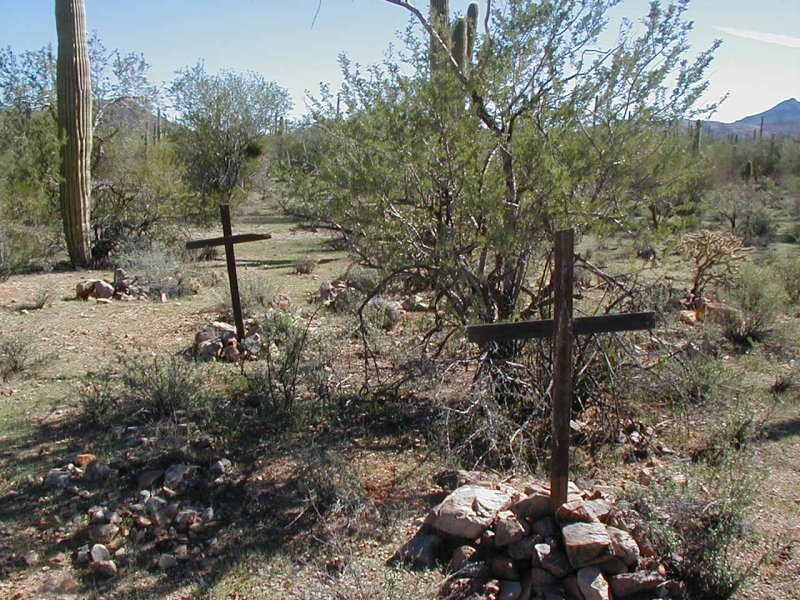
Silverbell Cemetery
Farther down the road, we discovered another trail that forked off to the right. I shifted my pickup into four-wheel-drive, and followed the fork a couple of miles toward the foothills of some nearby mountains. The trail descended into and crossed a large, dry wash. On the far side, the trail rose again, steeply twisting and turning, ascending into the next set of hills.
In theory, my truck had the clearance and power to navigate that rise, but we stopped short, contemplating whether we wanted to chance getting stuck on the eroded and pot-holed incline. No, this was to be a day of casual exploration, and we weren't out to prove anything. It seemed safer and more prudent to simply turn back... and that's when it happened.

Beautiful isolation
The truck became stuck in the sand, and the rear wheels buried themselves down to the axle. This should not have happened, and extricating ourselves should have been easy, but for one thing: We discovered that the transfer case was malfunctioning and the front wheels had become disengaged. I was left with two-wheel-drive only.
We had not come unprepared. We had several gallons of water, a day-and-a-half worth of food, shovels, rope, tow straps, buckets, fuel, and other tools and materials. We jacked up the truck and lined the space beneath the rear tires with large, flat stones. We lowered the truck, and made an attempt to leave the wash. The truck moved a couple of feet and then bogged down again.
Once more, we jacked up the truck, dug out the wheels, and inserted more rocks. We lowered the truck, engaged the transmission, and moved another foot or two. Again, the wheels sank in the sand. After an hour of this repetition in the blazing heat, it became apparent that we were likely to be stuck for some time. Absent mindedly, I flipped open my cell phone to let my wife know that we would be late... no bars! "Hmm, " I thought, "this is not good."
Now, I hesitate to make this story more of a drama than it really was. First, we had plenty of food and water. My truck has a cap, and there were plenty of trees for shade, so we were not exposed. I had my GPS with me, so I knew where we were. More importantly, I knew that if we continued jacking the truck, shoveling sand, and paving our way, we would eventually get ourselves out. The worst-case scenario, if all else failed, was to wait until the evening and then hike our way out.
Luckily, someone "up above" was looking out for us, because we suddenly heard the sound of an engine. An SUV appeared. The other vehicle's four-wheel-drive was functional, and he had no problem crossing the wash we were in. We used a tow strap to link my truck to his so that he could apply tension as I backed my way out. Inside of five minutes, we were free of the wash, back on the trail, and on our way.
Considering Communications
The experience left me considering the issue of communications. There are lots of 2-meter and 70-centimeter repeaters scattered on the mountaintops around here. If I'd had a radio, I could have reached my wife to let her know what was going on, and if necessary, I could have asked for assistance. I decided that this would justify buying a new HT.
I spoke with people, considered product reviews on eHam.com and other sites, weighed my findings against my budget, and then purchased a Yaesu FT-60R. The FT-60R is well regarded by owners, and while it does not meet military specifications for shock and water resistance, most consider it solid and well-built.
In addition to the radio, I purchased two accessories. First, the stock rubber antenna leaves something to be desired. On the advice of others, I purchased a longer "super flexible" whip. Simply swapping that antenna for the one that came with the FT-60R made a big improvement in the radio's ability to hit neighborhood repeaters.
Second, I don't like radiating antennas near my head or my face. I purchased a hand mike that doubles as a speaker. I can wear the radio at my hip, and attach the mike/speaker to the lapel of my jacket. The sound quality coming out of the speaker is surprisingly good, and other operators report that the transmitted audio is equally clear.
All in all, I was pleased with my purchase. Yet, when I pictured myself hiking through a thicket of bushes, or scrambling over boulders on a mountainside, I could easily envision my new rig being scratched, dropped, or smashed. And, as the antenna mount is an SMA connector, breaking it off would take no effort at all. I began to contemplate how I might "ruggedize" my rig.
A Bag To Carry It In
My first thought was to find a case or container to house the radio in. I wanted this case to provide a reasonable amount of abrasion and shock protection to the radio, and I wanted to be able to attach the enclosure to my belt. At the same time, I wanted to be able to access the radio for tuning or adjustments without too much trouble.
In my case, the solution appeared in the form of some Vietnam-era Army-surplus. I found an M1956 Universal Small Arms Ammunition Pouch in a dusty box at a local hamfest and purchased it for three dollars. This pouch would form the basis for my "ruggedized" FT-60R, but similar pouches can be found at Army Surplus stores, on the Internet, and through surplus catalog sales.
My pouch features so-called "ALICE" (All-purpose Lightweight Individual Carrying Equipment) clips, which allow it to be quickly and easily attached to my web belt. I liked what this pouch had to offer, but I wasn't completely satisfied, at least not yet.
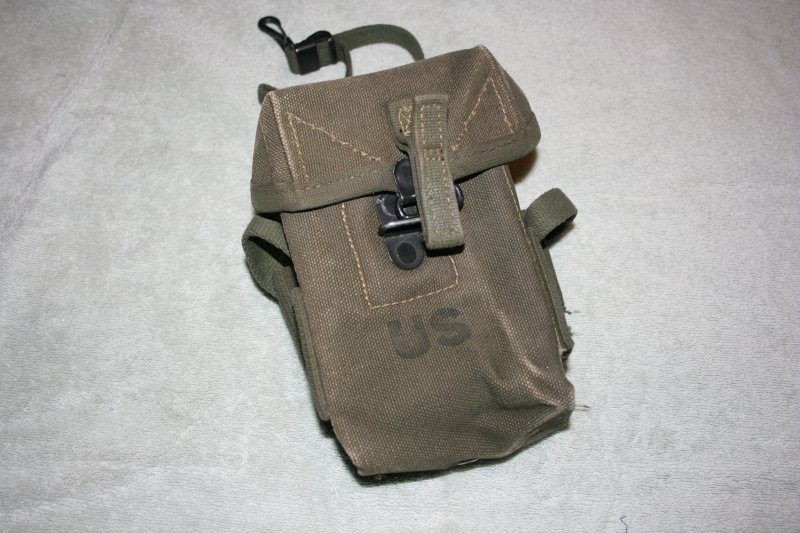
The Universal Small Arms Ammo Pouch
While the radio nestled nicely inside the pouch, an immediate question emerged: what to do with the antenna? I weighed my options. First, I could leave the pouch open with the antenna protruding from the top, but this would sacrifice much of the protection that the pouch would otherwise offer.
I considered closing the top of the pouch and trying to snake the flexible antenna out through a seam. No, that was no good because sooner or later I would bend or break the antenna.
I thought about cutting a small hole in the lid of the pouch and letting the antenna poke straight through. This idea was a little better, but it compromised the pouch's ability to shed moisture. Moreover, operating the radio would require me to open and close the pouch with some regularity. With the antenna protruding through the lid, and the lid hinging up and down, I anticipated stressing the antenna or worse, breaking the antenna mount on the radio itself.
Trust me when I say that I invested a lot of thought into how best to use my ammo pouch to secure the radio, allow for easy access to the controls, and allow for a functional antenna. My solution exceeded my expectations, and is described in the text that follows.
A Framework For Protection
I began by fabricating a U-shaped frame from a piece of stiff aluminum sheet. I used a couple of chunks of two-by-four and my vise to bend and form the metal. The purpose of the frame is to protect the radio and provide a surface to which the radio's belt clip can be attached. The exact dimensions of the completed frame are not critical. What is important is the relationship of the frame's dimensions to the dimensions of the pouch and the radio.
Overall, the frame was sized so that it would slide easily into the pouch. All corners were rounded and sharp edges were dressed with a file.
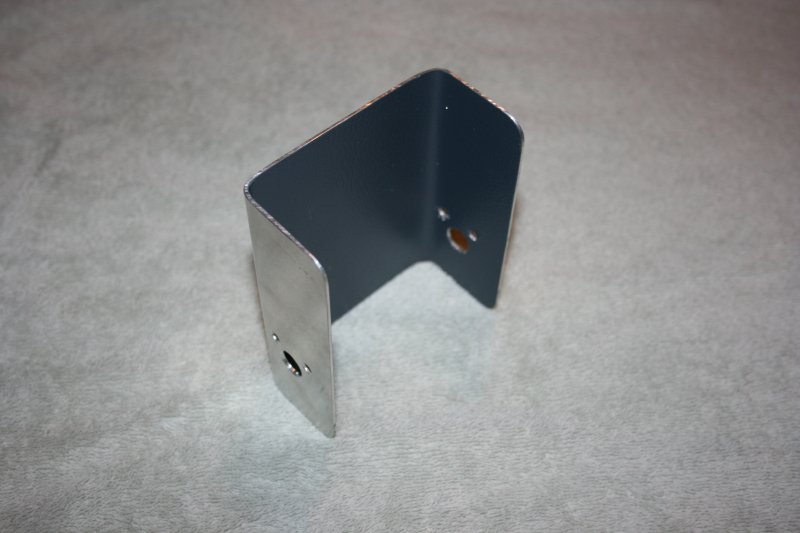
The aluminum frame, fabricated from sheet-aluminum
The height of the frame was sized so that, when it was in place inside of the pouch, and when the FT-60R's belt clip was clipped to the frame, the radio would essentially "float" within the interior of the pouch. In other words, there was clearance between the bottom of the radio and the floor of the pouch, and there was clearance between the top of the radio and lid of the pouch when closed.
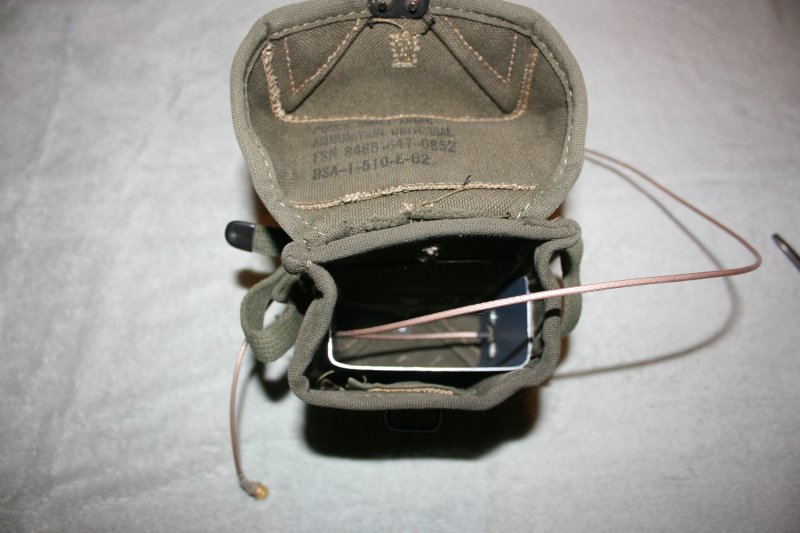

The frame and the radio, inside the pouch
The depth of the frame, (the length of the "legs" on the frame) were sized to meet two criteria. Since the radio will float between the legs of the frame, the legs must be longer than the thickness of the radio so as to protect the radio from being crushed. At the same time, the depth of the frame should be somewhat less than interior space of the pouch, so as to allow clearance for the radio's belt clip.
Note that the frame and radio are installed so that, when the pouch is worn, the open side of the frame faces the wearer, with the radio's belt clip facing the opposite direction. The effect is that if the radio is extracted for adjustment, the display will face the operator.
The holes visible in the frame will be described in just a moment. Note that some are superfluous, and are the result of exerimentation.
An Antenna That Works
The dilemma of what to do with a protruding antenna vanished when I realized that the antenna did not have to be attached to the radio! I had purchased a small mag-mount antenna for my car and as I installed it one afternoon, it occurred to me that the same idea-- a separate antenna with its own base, attached to the radio by a length of coax� could be applied to my radio pouch.
Digging through my junk box, I located all of the pieces I needed: a small aluminum box, some SMA connectors, and short length of coax. Using small bolts and a bit of brass, I mounted a female SMA connector to the box. I soldered a length of coax to the connector, and then terminated the free end of the coax with a male SMA. The flexible whip antenna, described earlier, threaded onto the connector on the aluminum box. The other end of the coax attached to the radio.
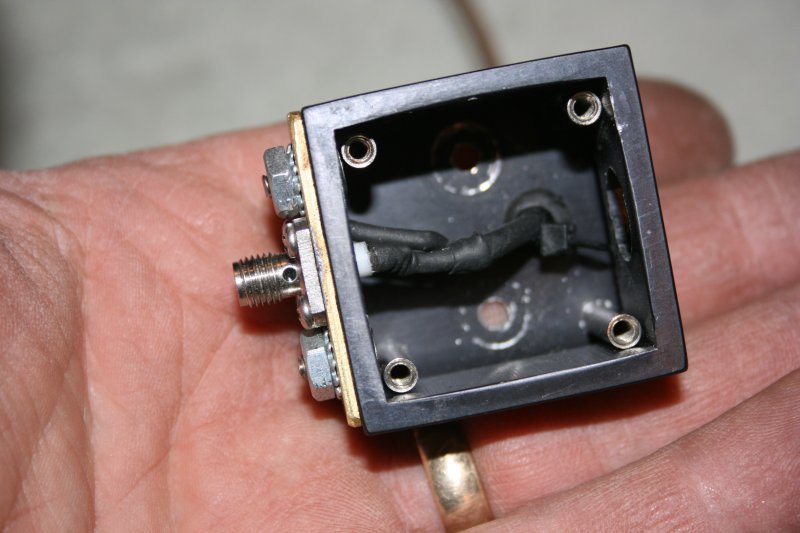
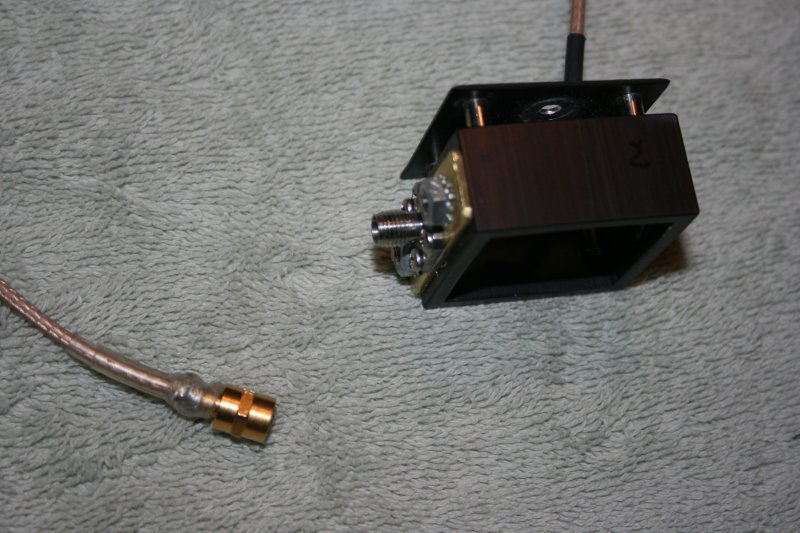
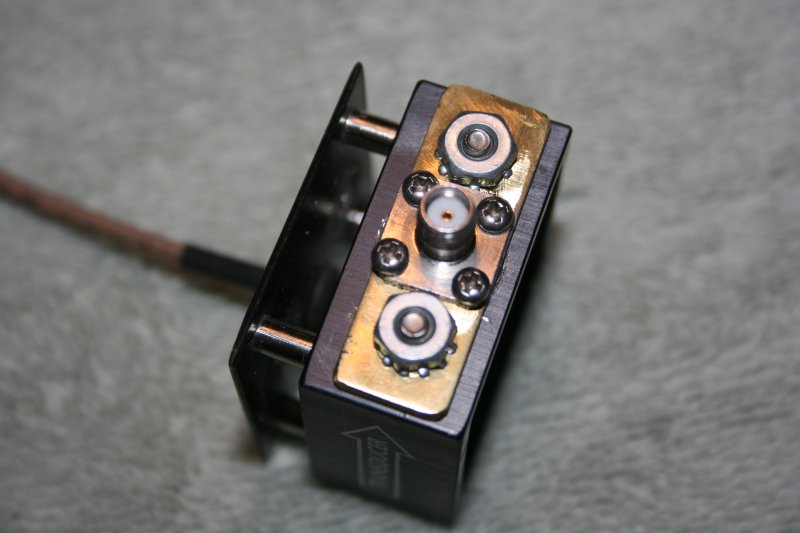 Details of the antenna box
I mounted this antenna box on the side of the pouch. This required drilling holes through the side of the box, through the side of the pouch, and through one of the legs of the frame. I drilled two holes sized to pass 6-32 bolts. A third hole was sized large enough to allow me to thread the coax from the antenna box into the interior of the pouch. Some of these holes are visible in the photo of the frame, described earlier.
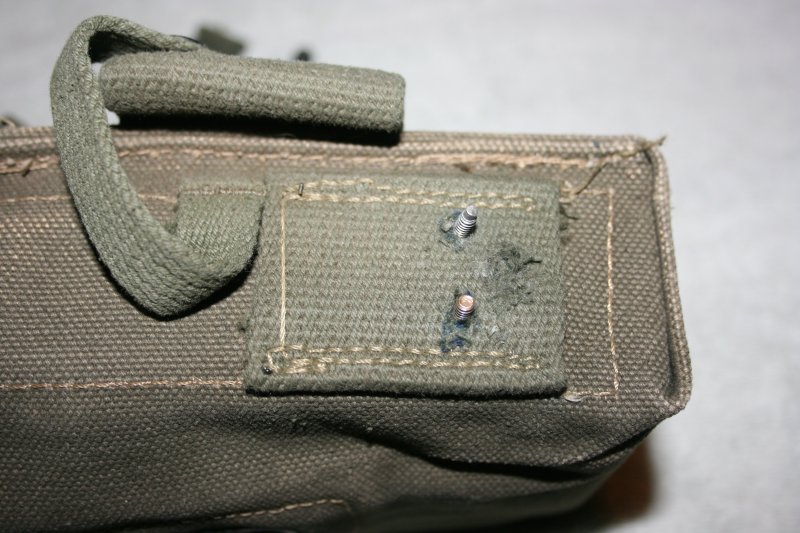
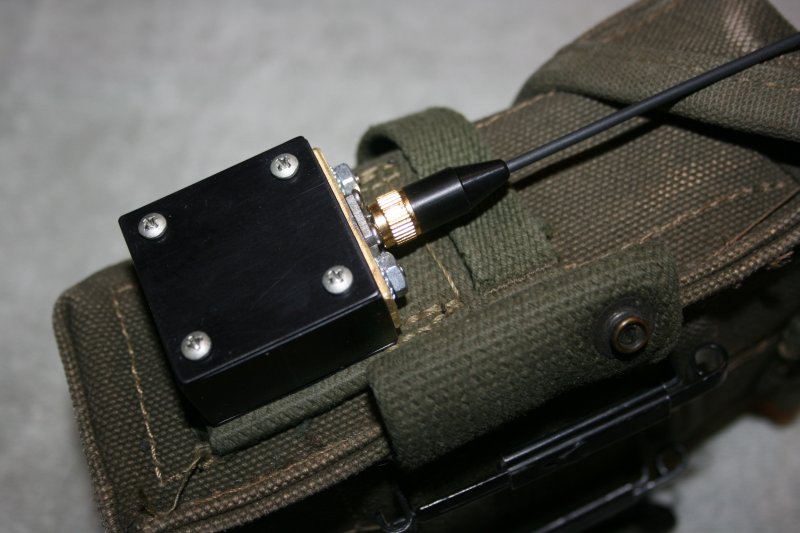
Holes, screws, and the mounted antenna box
Bonding the antenna box to the frame offers two advantages. An obvious advantage is mechanical rigidity and strength. What is less obvious is that the frame acts as a partial ground plane, greatly improving the effectiveness of the antenna. In experimenting with this, I found that repeaters that could not be worked with the whip alone, came in loud and clear when the antenna box was bonded to the frame.
Conclusions
There is no single "best way" to implement a solution like the one I've just described. Much depends upon one's design objectives, and more importantly, the specific radio in question and the parts and materials on hand. However, I think that there are ideas implicit in this design that might be of interest to others.
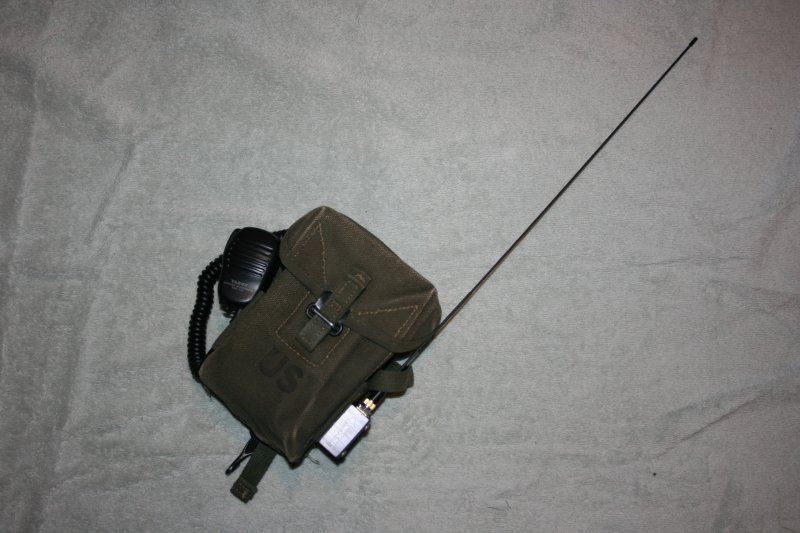
The complete package, with hand mike and antenna
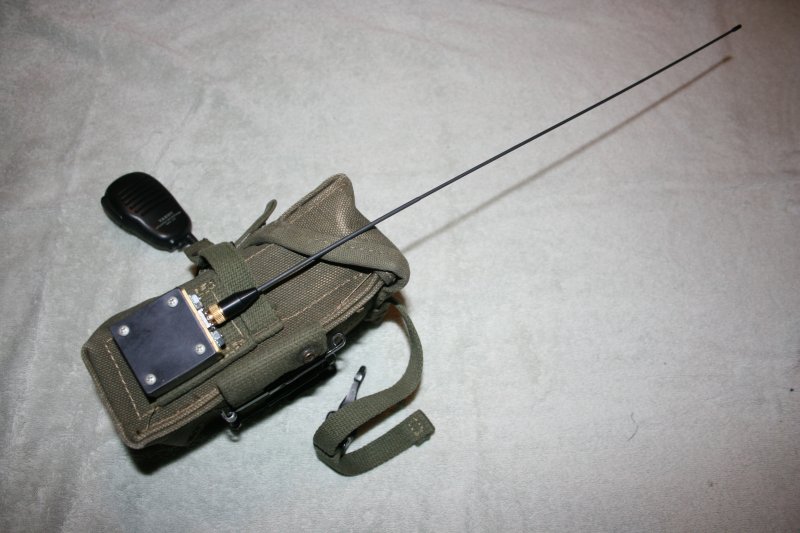
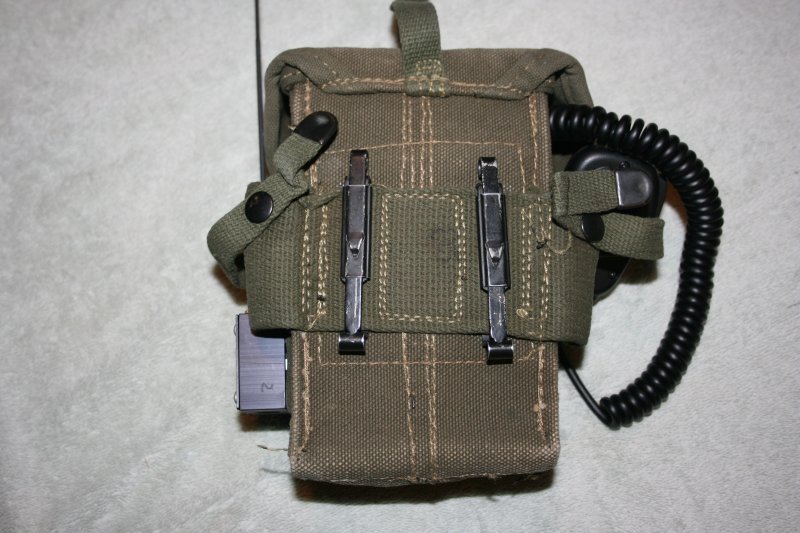
Side and back view of the rig
While not hermetically sealed, the pouch still offers significant protection to the radio from sand, dust and possible precipitation, as well as the destructive effects of direct sunlight, which is very intense here in the Southwest. Thus enclosed, I expect the radio to remain free of scratches, dings, and scuff marks.
If the radio is dropped, shock is reduced by the energy absorbent characteristics of heavy canvas. The frame prevents accidental key-pressing, and provides enough protection from pressure that under normal circumstances, the radio cannot be damaged. In fact, if the radio was ever struck hard enough to flatten the frame while I was actually wearing it, a broken radio would be the least of my concerns.
The combination of the new whip, the antenna box, and the frame seem to provide superior performance with respect to the stock antenna. There is no way for any mechanical forces directed on the antenna to find their way back to the radio. The antenna and antenna box can be damaged, but the radio will remain unscathed.

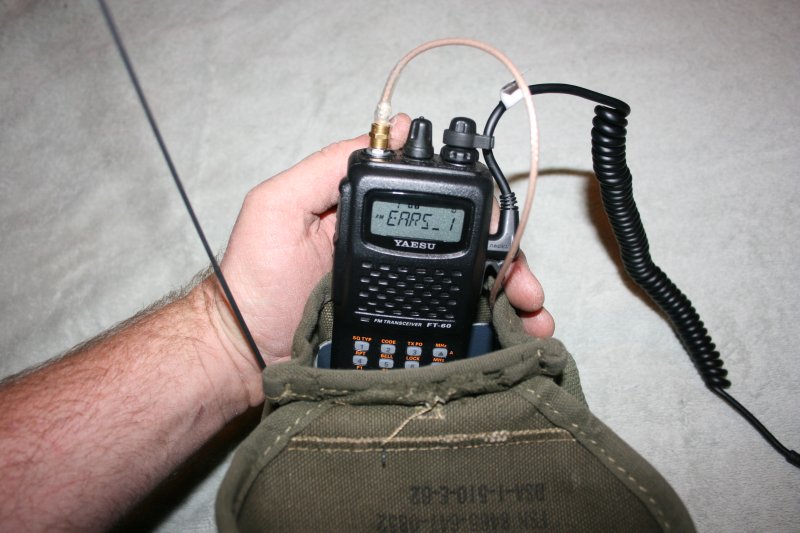
The FT-60R, safe and sound
The HT can be used with a whip, with the dual-band mag-mount antenna in my car, or with my Sat-Com antenna. I can use an alligator clip with a short piece of flexible wire as a counterpoise, by clipping it to the frame inside the bag, and dangling the wire through the drainhole in the bottom of the bag. Whatever the antenna configuration, I like the fact that any wear-and-tear resulting from repeated attachment and removal of cables is occurring to the SMA connector on the antenna box, not the connector on my radio.
Ideally, I'd like to find another small pouch to house some accessories. I have a spare battery pack that accepts regular AA batteries. The nice thing about it is that I always know it's fresh. I recently made a cigarette lighter cable for the radio, complete with an internal diode to protect the rig from reverse voltages and over-voltage spikes. A roll-up J-pole, fabricated from a piece of 300-ohm twin lead would make a nice, unbreakable, backup antenna.
The next time my son and I head out to explore the desert, my FT-60R will be going with us. You can bet I will know which repeaters are active and which are reachable. Perhaps I'll even work a satellite or two.
Document Revision 1, 04/22/2009
Document Revision 2, 04/23/2009
Document Revision 3, 04/28/2009